
 Pin
Pin
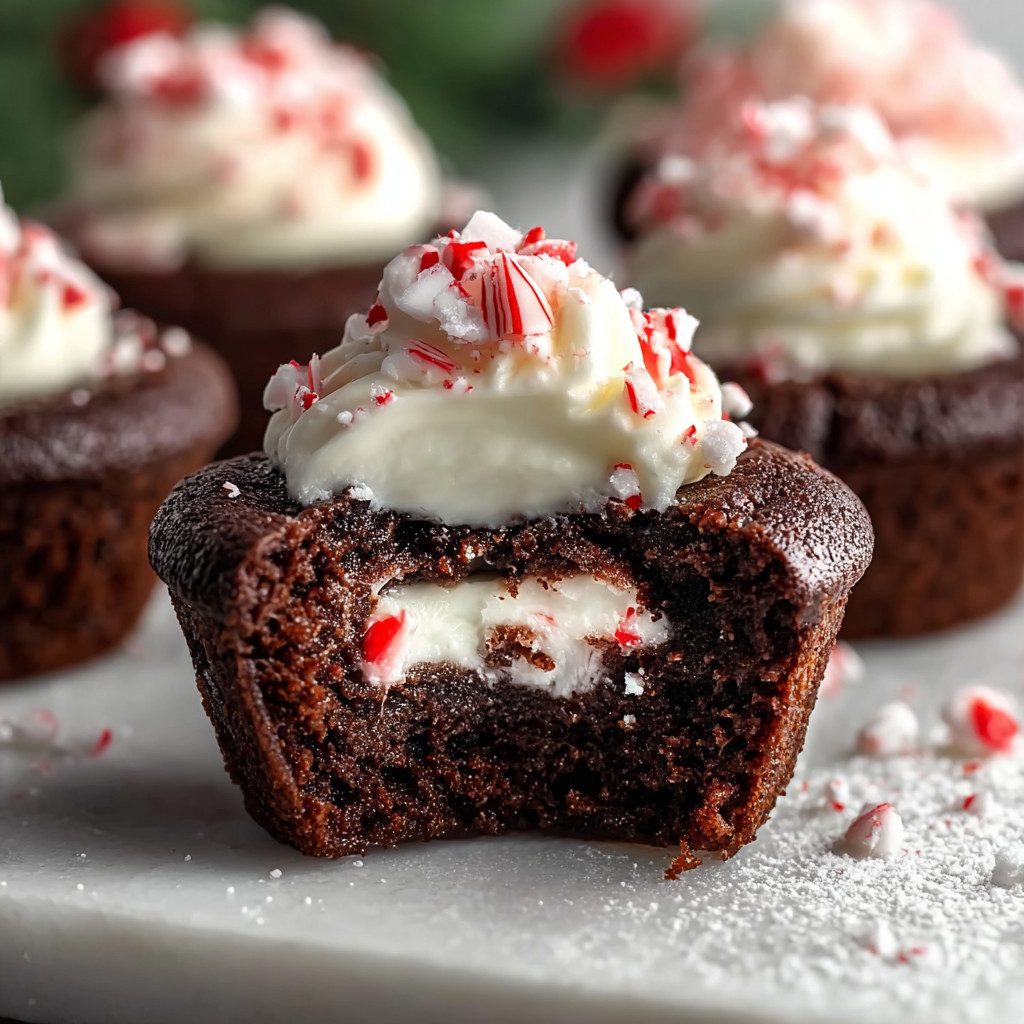
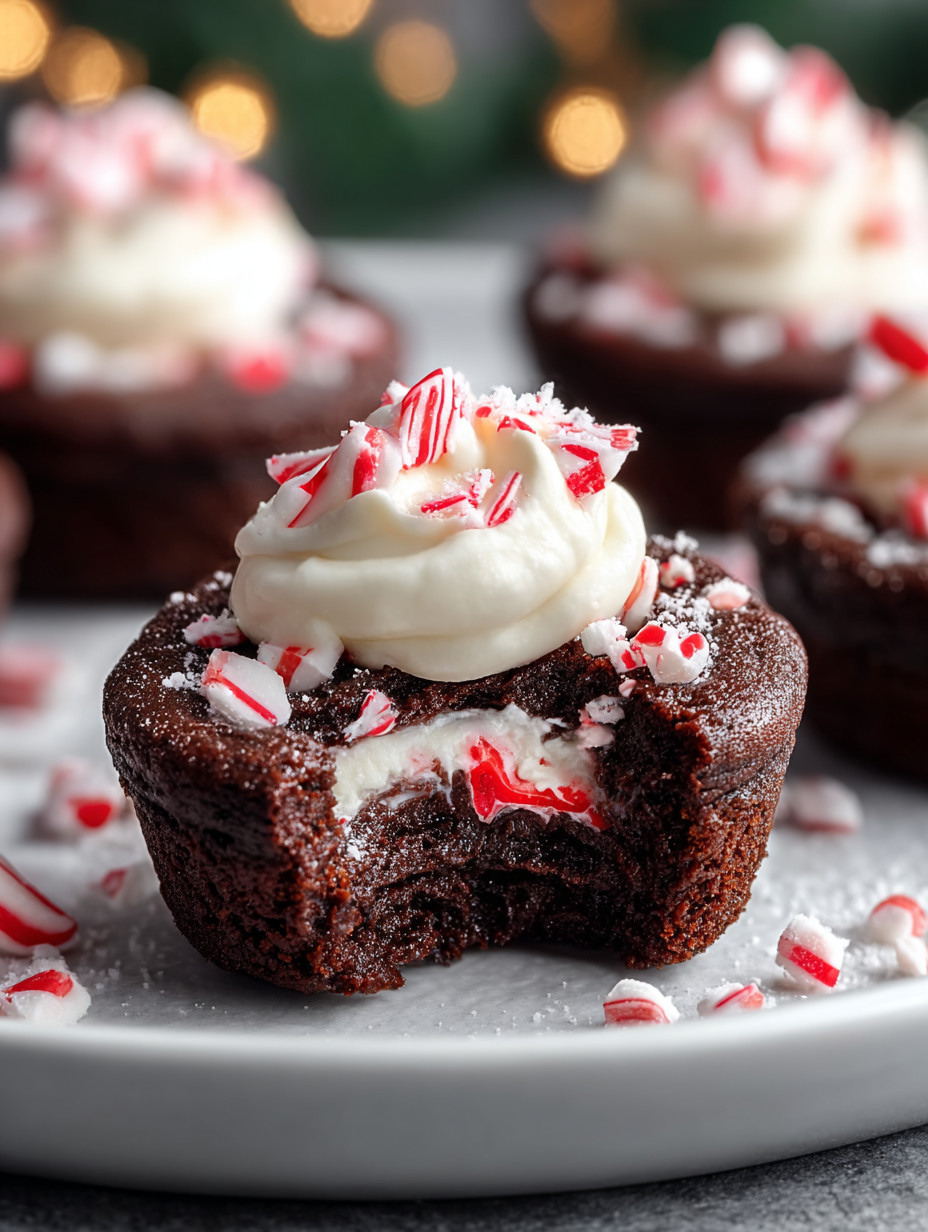
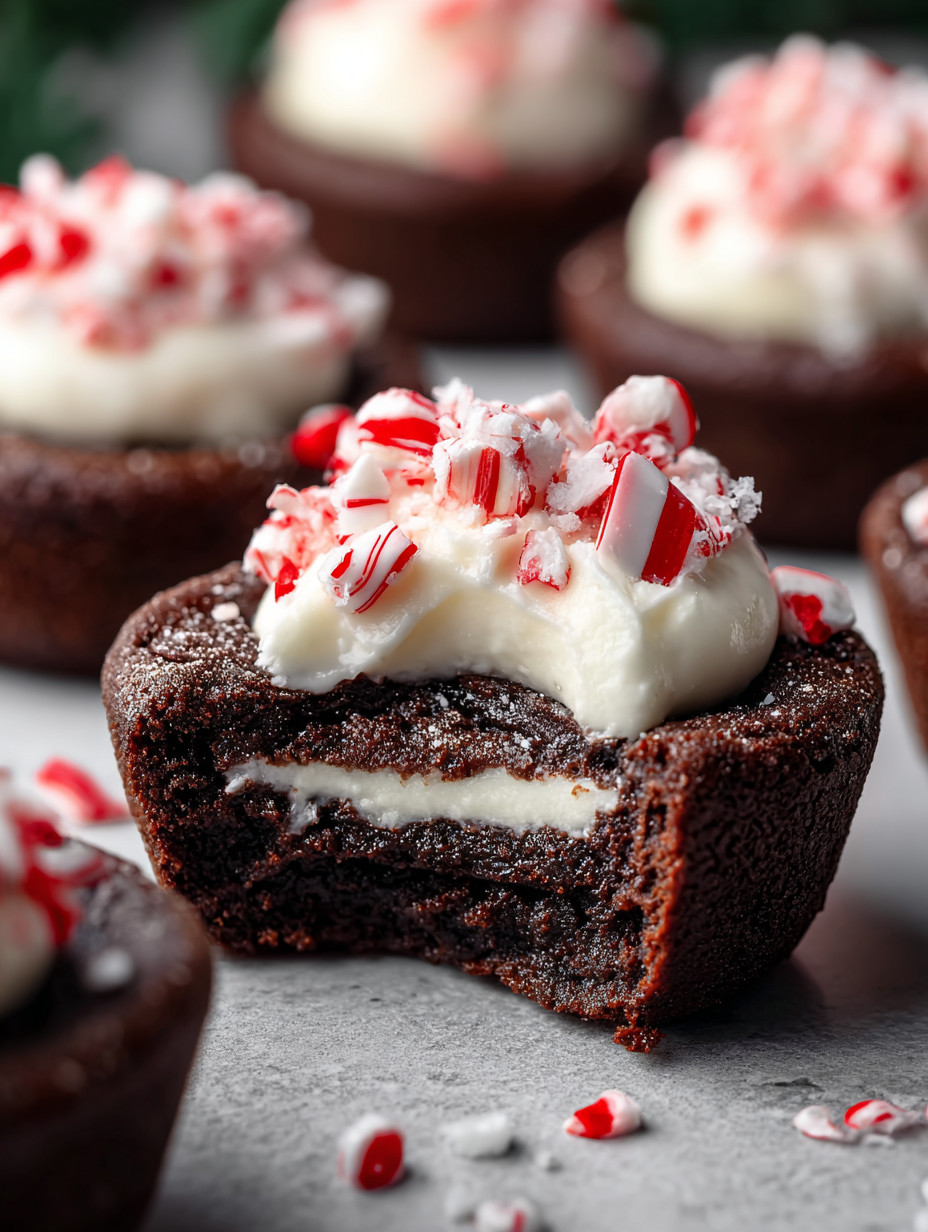
Chocolate Peppermint Cookie Cups bring festive spirit and irresistible richness to your holiday table. There is something magical about the way fudgy chocolate cookies cradle a cool, airy peppermint cheesecake filling. These little cups are easy to transport, fun for decorating, and always a hit with friends and family. Every time I serve these at parties, they disappear faster than anything else on the dessert tray.
Last winter I made these with my daughter on a snowy weekend, and now she asks for them every year when we set up the Christmas tree. They have quickly become our favorite way to kick off the season.
Ingredients
- All-Purpose Flour: shapes the chewy cookie cup and keeps the base sturdy look for a fine, unbleached variety for best texture
- Dutch-Processed Cocoa Powder: brings deep chocolate notes for full-bodied flavor make sure it smells fresh and chocolaty before using
- Black Cocoa Powder: provides an intense, dark color with extra boldness use more Dutch-processed cocoa if you cannot find black cocoa
- Baking Soda: leavens the dough for the right lift and crumb avoid any with visible clumps
- Salt: sharpens the chocolate and balances sweetness choose a fine-grain kosher or sea salt for better mixing
- Unsalted Butter: creates a soft bite and rich taste try to use European-style for enhanced flavor
- Granulated Sugar: ensures a tender crumb and adds sweetness use fresh, lump-free sugar for the best results
- Light Brown Sugar: brings a hint of caramel and added moisture press it firmly when measuring for accuracy
- Large Eggs: bind everything together and add structure let them come to room temperature for easy mixing
- Vanilla Extract: enhances the flavors of both chocolate and peppermint pick a pure extract for the best results
- Heavy Whipping Cream: gives fluffiness to the cheesecake layer always keep extra cold for better whipping
- Cream Cheese: builds the creamy, tangy filling use full-fat blocks for a smooth consistency
- Peppermint Extract: lifts the flavor of the filling check that the bottle smells bright and not overly minty or medicinal
- Red Color Gel: optional but perfect for adding a festive swirl to your filling choose a gel food color for more vibrant color with less mess
- Chopped Candy Canes: add crunch and peppermint bursts use freshly crushed pieces for vibrant color and the freshest flavor
Step-by-Step Instructions
- Preheat and Prepare Pan:
- Set your oven temperature to 350°F or 175°C and generously grease cupcake tins with nonstick spray or butter so cookie cups release easily and bake evenly without sticking
- Mix Dry Ingredients:
- Whisk flour Dutch-processed cocoa black cocoa baking soda and salt in a large mixing bowl until all cocoa and baking soda streaks disappear This guarantees even flavor and proper leavening
- Cream Butter and Sugars:
- Beat together unsalted butter granulated sugar and light brown sugar in a separate bowl for up to three minutes until the mixture becomes fluffy and pale This traps air in the dough helping cookies bake up light and soft while dissolving sugar fully
- Combine Wet and Dry Mixes:
- Add eggs one at a time to the butter-sugar mixture mixing well after each Stir in vanilla extract Switch to low speed or a spatula and gently add flour and cocoa mixture just until there are no more streaks Avoid overmixing to prevent tough cookies
- Portion and Bake Cookies:
- Scoop about three tablespoons of dough for each cup in your prepared pan Fill to about three quarters full Bake eleven to thirteen minutes until the edges look set but the centers are still soft This allows the cookies to be formed into cups
- Create Wells:
- Once out of the oven immediately press a rounded object like a small jar into the center of each cookie to create a well for the cheesecake filling Work gently to prevent cracking and shape each well while the cookies are still warm
- Cool Completely:
- Allow cookies to cool in the tins for ten minutes then transfer to a wire rack until fully cooled This step keeps them intact while still developing their classic chew
- Prepare Cheesecake Filling:
- Whip cold heavy cream in a chilled bowl until stiff peaks form In another bowl blend cream cheese with sugar and peppermint extract until velvety Fold in the whipped cream gently to keep the filling fluffy
- Fill Cookie Cups:
- Spoon or pipe the cheesecake filling generously into the cooled cookie cups Piping makes for a tidy look and even layers
- Chill Before Serving:
- Place the filled cookie cups in the fridge for one or two hours so the cheesecake sets This makes them easy to pick up and bite into with a perfect creamy texture
- Add Final Touch:
- Just before serving sprinkle chopped candy canes over the filling for sparkle crunch and festive peppermint bursts Serve right away for best texture and flavor
 Pin
Pin
Every time I crush candy canes for the topping the peppermint aroma fills the kitchen and instantly puts my family in a holiday mood. Cream cheese is my secret weapon here since its tanginess makes the filling perfectly refreshing no matter how rich the cookie base is.
Storage Tips
Store your assembled cookie cups in an airtight container in the refrigerator for up to three days. Freeze any extra in sealed containers then thaw overnight in the fridge for treats ready any time guests drop by. Always wait to sprinkle the candy cane until just before serving so each bite stays crisp and colorful.
Ingredient Substitutions
You can use a gluten-free flour blend in place of regular flour to make this recipe friendly for everyone. Dutch-processed cocoa works just fine if you do not have black cocoa and you can swap peppermint extract for mint but taste as you add since mint extract can be stronger. If cream cheese is not available mascarpone gives a similar creamy texture and tang.
Serving Suggestions
Set cookie cups out on a holiday dessert platter with fresh berries or serve with mugs of hot cocoa for a winter wonderland vibe. Their pretty presentation also makes them a thoughtful edible gift packed up in a festive box. For a fun touch add a drizzle of melted chocolate or a swirl of colored gel atop the cheesecake filling.
 Pin
Pin
A Bit of Cookie Cup History
Cookie cups have become hugely popular as an updated twist on brownies and traditional drop cookies. Their compact size and decorative appearance make them party friendly and easy for small hands to hold. This chocolate peppermint version combines American holiday cookie traditions with cheesecake filling for a treat that always feels special.
Recipe FAQs
- → Can I use gluten-free flour instead?
Yes, substituting with a gluten-free flour blend works well, maintaining the chewy texture while accommodating dietary needs.
- → Is black cocoa powder necessary?
Black cocoa adds intense color and richness, but Dutch-processed cocoa can be a good alternative with slightly lighter color.
- → How long should the cookie cups chill?
Chilling for 1 to 2 hours firms the cheesecake filling for easier slicing and balanced flavor meld.
- → Can these be prepared ahead of time?
Absolutely. Bake and fill in advance, then store refrigerated or frozen to keep fresh for holiday events.
- → Is there a substitute for peppermint extract?
Mint extract can be used, but reduce the amount since it usually has a stronger flavor.
- → Can these cookie cups be frozen?
Yes, freeze in an airtight container for up to one month. Thaw in the fridge before serving to preserve texture.
- → What else can I use instead of candy canes for topping?
Try crushed peppermint bark, red and white sprinkles, or chopped white chocolate for a festive touch.