
 Pin
Pin
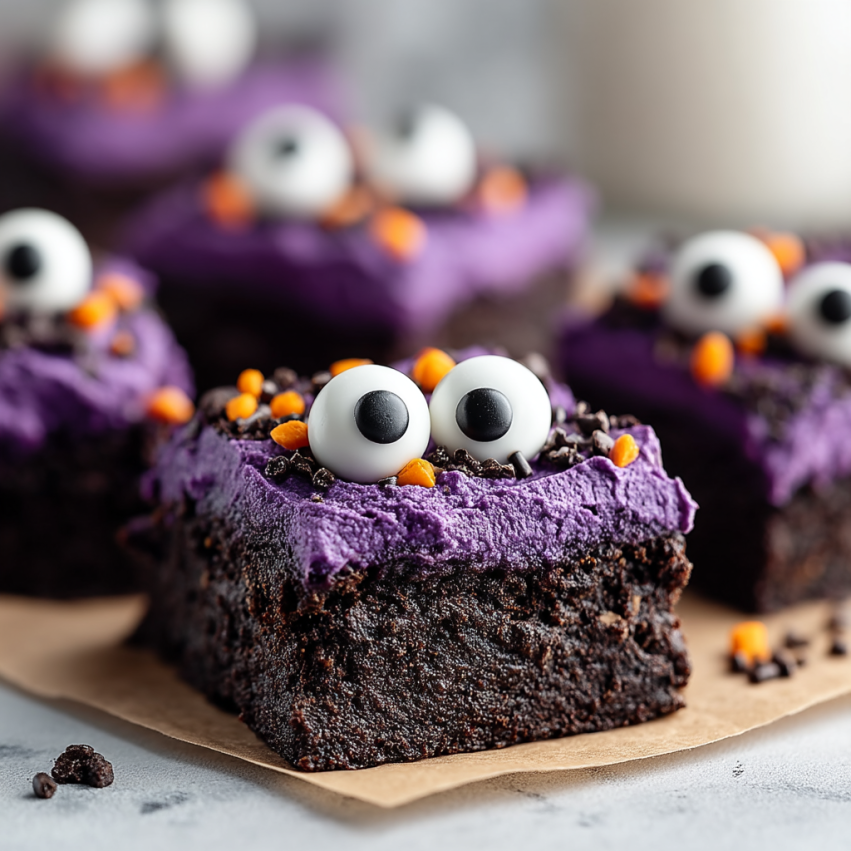
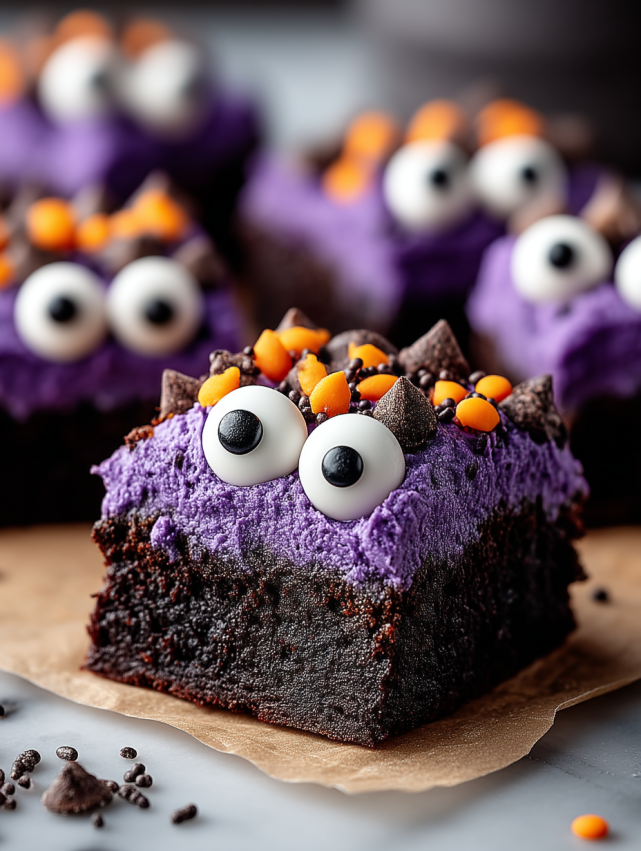
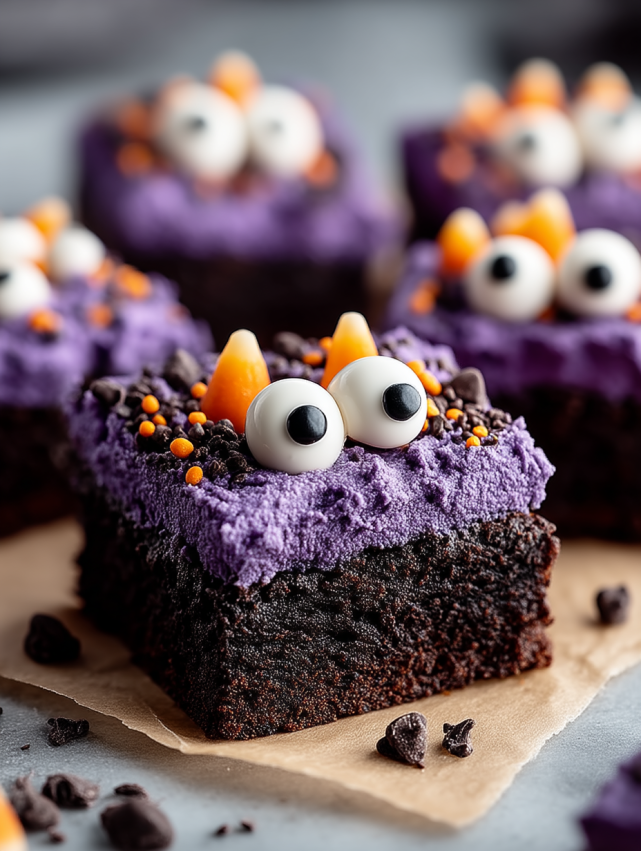
Monster Mash Brownies bring pure joy to any Halloween celebration. Whether you want a treat that doubles as a kid-friendly activity or need a dessert that steals the show at school parties, these frosted brownies offer big flavor and even bigger fun. I love how the brownies’ monster faces end up looking different every single time—some spooky, some silly, and all irresistible.
My nephew declared these the best Halloween treat last year and now every holiday he asks if we can make them together. Decorating is just as memorable as eating them because monsters do not have to be perfect and each creation is one of a kind.
Ingredients
- Boxed brownie mix: Pick a rich fudgy mix for the best results—look for Ghirardelli for maximum chocolate flavor
- Eggs oil water: Refer to your box and use high quality eggs and neutral oil like canola for a moist result
- Vanilla frosting: Store bought is convenient—choose one that is thick and easy to tint
- Food coloring: Go for gel color for the most vibrant monsters without watering down your frosting
- Halloween sprinkles: Look for festive shapes like bats pumpkins or bones to add color and crunch
- Candy eyes: Pick different sizes for personality and always buy extra for decorating and snacking
- Mini chocolate chips: Fold in for chocolate bursts throughout or to create monster spots
- Chopped candy bars: Add to batter for sweet surprises in every bite
- Orange or black sanding sugar: Sprinkle on top for sparkle and extra Halloween flair
Step-by-Step Instructions
- Prepare Your Pan:
- Line a 9 by 13 baking pan with parchment paper so you have an overhang on each side which allows for easy lifting after baking. Smooth out any creases in the corners and lightly grease the exposed areas for easy release.
- Mix the Brownie Batter:
- Combine the contents of your brownie mix box eggs oil and water in a large mixing bowl following the exact package directions. Stir just until the last streak of flour disappears for a uniform glossy batter but do not overmix or the brownies become dense.
- Bake Your Brownies:
- Pour the batter into the lined pan and spread evenly with a rubber spatula to reach every corner. Bake on the center rack at the temperature listed on your box usually 350 degrees and check a few minutes before the box’s minimum time. Test with a toothpick inserted in the center—aim for a few moist crumbs but not raw batter then cool in the pan on a wire rack.
- Cool Completely:
- Leave the brownies in the pan for at least an hour until totally cool to the touch. For perfect slicing you can chill the pan briefly in the fridge which also helps firm up the brownies for easy frosting.
- Tint Your Frosting:
- Divide the vanilla frosting into separate bowls for each color you want to use. Drip gel food coloring into each bowl mixing very well and adding more color in small increments until the shade is bold. The colors deepen slightly as they sit so give them a few minutes to develop.
- Frost and Decorate:
- Spread the colored frosting evenly over the cooled brownies using an offset spatula for smoothness. Immediately top with sprinkles and randomly press candy eyes in different groupings and angles across the surface for wacky monster expressions. Layer on more eyes or chips for extra detail.
- Set and Slice:
- Allow the decorated brownies to sit at room temperature for about twenty minutes so the frosting firms up a bit. Remove from the pan using the parchment overhang and transfer to a cutting board. Use a sharp clean knife to slice into twelve neat squares rinsing and wiping the knife between each cut for tidy edges.
 Pin
Pin
The candy eyes are always my favorite ingredient. One year my niece made a whole tray covered in eyes with only two actual monsters and it is still the family’s Halloween running joke. The best part about monster brownies is seeing every kid light up when they create their own little creatures with way too many eyeballs.
Storage Tips
Keep finished brownies in a tightly sealed container at room temperature for up to three days. If they will be in a warm environment use a butter based frosting for stability and store them in the fridge letting them sit at room temperature a bit before eating. For longer storage freeze unfrosted brownies and add decorations just before serving. Do not freeze decorated brownies as the frosting and candy eyes can get sticky and lose their shape.
Ingredient Substitutions
Use homemade brownies if you enjoy baking from scratch. A favorite cocoa based recipe works as long as it fits a 9 by 13 pan. Swap vanilla frosting for cream cheese frosting for a tangy touch or chocolate if you want double chocolate decadence. If candy eyes are unavailable pipe little dots of frosting and add brown mini chocolate chips for makeshift monsters. You can even add coconut or dried fruit for something different.
Serving Suggestions
Display brownies on a black or purple platter for extra Halloween drama. Make a dessert buffet with other festive treats like caramel apples or popcorn balls. To create a DIY station for kids prep several bowls of colored frosting and different decorations then let everyone build their own monster. For grownups serve with fresh coffee or even a spooky cocktail for a playful end to a party meal.
 Pin
Pin
Cultural and Holiday Spirit
Monster Mash Brownies capture the creative playful spirit of Halloween. Candy eyes are borrowed from classic monster movies and cartoons making these treats a nod to pop culture as well as a modern family tradition. Baking and decorating these with kids brings everyone into the holiday fun with low stress and maximum laughter. Each pan is as wild and unique as the people who make them.
Recipe FAQs
- → Can I skip food coloring?
Yes, white frosting works deliciously. For natural hues, powders like beet or spirulina create soft colors, though not as vivid as gels.
- → How to frost without tearing brownies?
Ensure brownies are completely cool. Use soft frosting and spread gently with an offset spatula, starting with a thin crumb coat.
- → Will candy eyes stick without frosting?
Frosting acts as an adhesive. Without it, decorations won’t stay firmly, but pressing candy eyes into warm brownies right after baking might work.
- → Can I use homemade frosting?
Absolutely, buttercream or cream cheese frosting hold decorations well if thick enough. Adjust thickness with powdered sugar or milk as needed.
- → What if I lack a 9x13 pan?
Smaller pans work; adjust baking time accordingly. Thicker brownies may need extra minutes, check doneness with a toothpick.
- → How early to decorate?
Best within 24 hours of serving. Longer storage in fridge helps but candy eyes and sprinkles may shift or bleed color.
- → Candy eyes sliding off—why?
Often due to thin or warm frosting. Chill frosting before decorating and press eyes gently for better adhesion.
- → Can children help with these brownies?
Definitely! Kids enjoy stirring batter and decorating once brownies are cooled. Supervision needed for oven use.