
 Pin
Pin
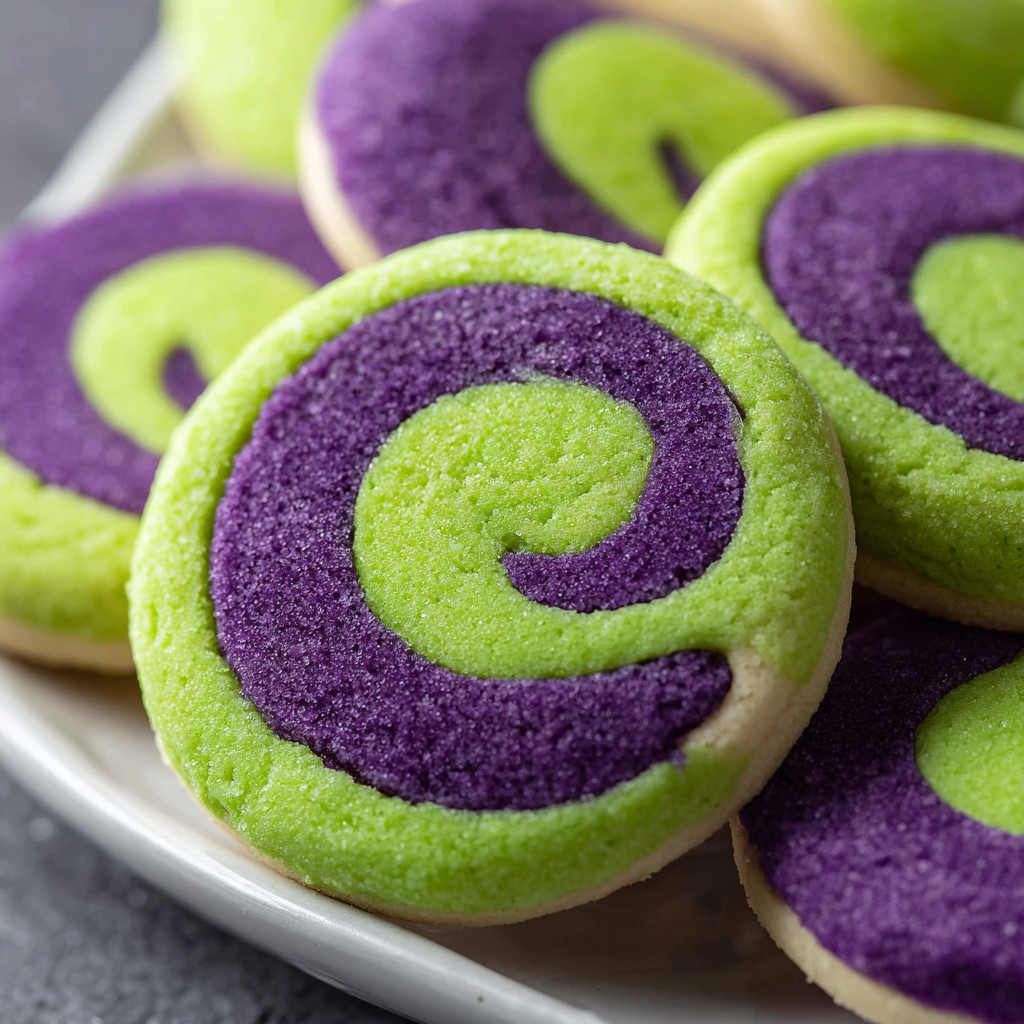
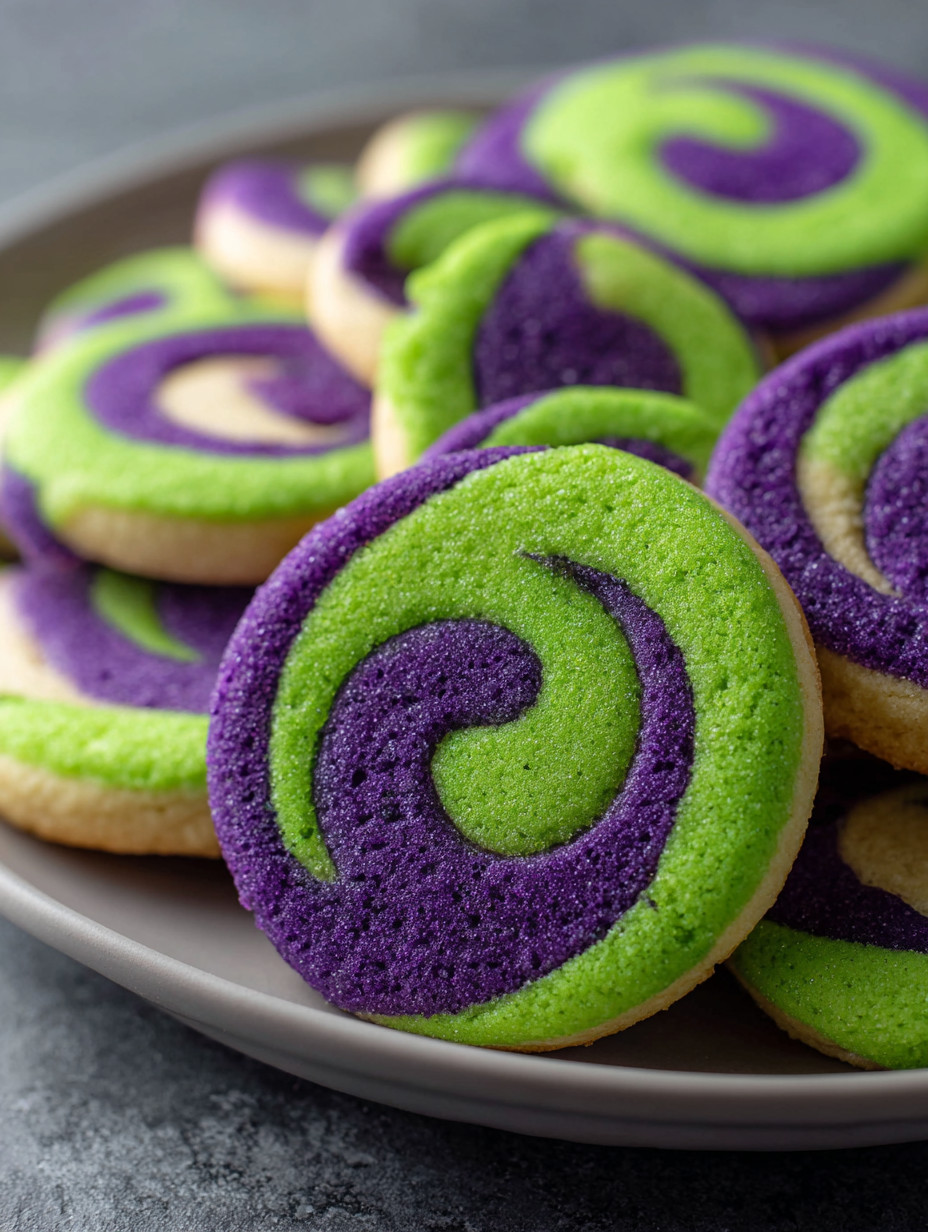
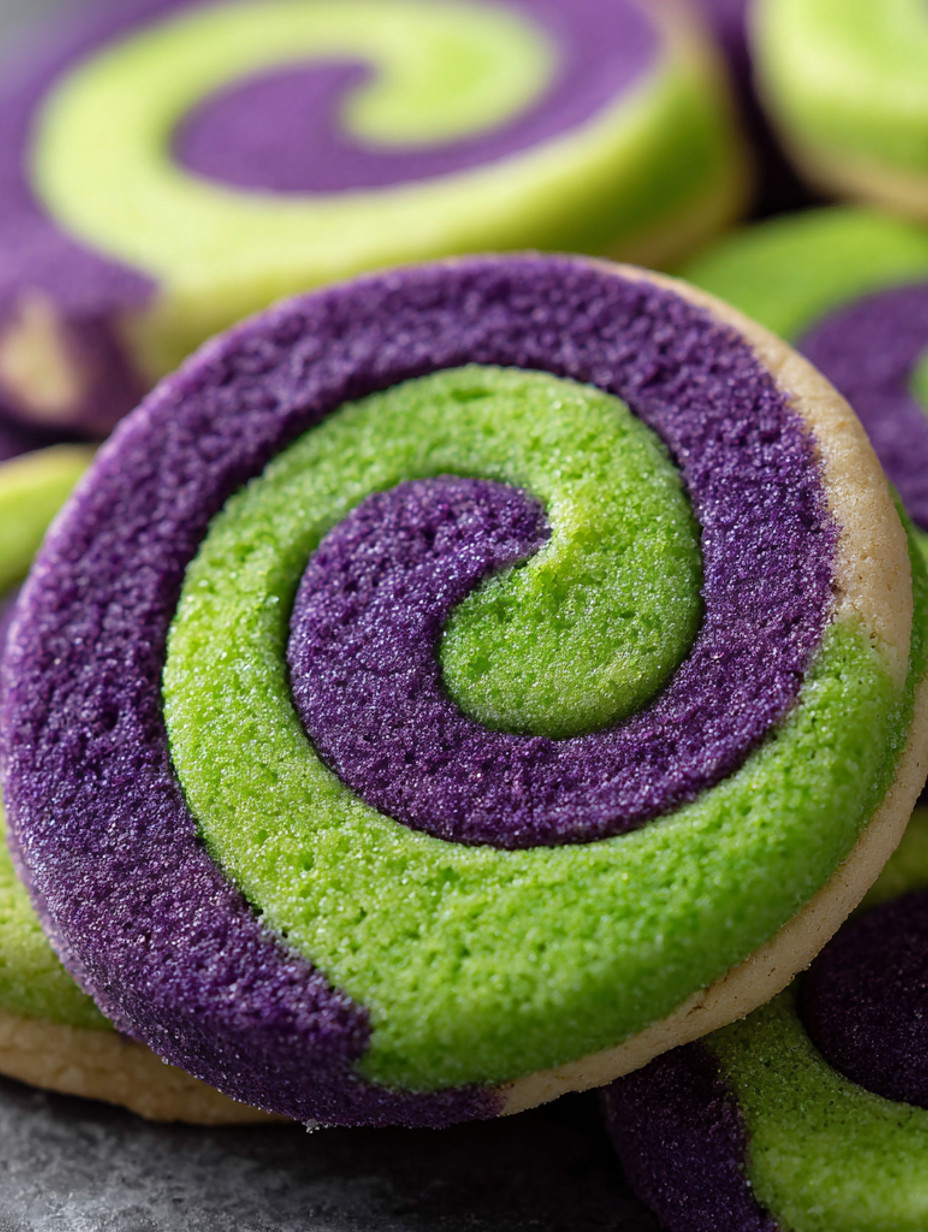
These vibrant Halloween pinwheel cookies have become an anticipated treat at every fall gathering in our home. Basic sugar cookie dough gets transformed with bold green and purple swirls, thanks to a little gel food coloring and a few simple shaping tricks. The process is easy enough for kids to help, and watching the spiral design appear in every slice never loses its magic. These cookies always spark conversation and bring out the festive spirit, making them my go-to for parties, neighbor gifts, and creative baking afternoons.
I first made these to fill Boo baskets for our neighbors one October, and now my family begs for new color combos whenever a holiday comes around. My kids especially love rolling and slicing the dough and watching the cookies bake up in a swirl.
Ingredients
- All purpose flour: gives structure and the classic sugar cookie bite. Choose unbleached for best texture
- Baking powder: creates a soft lift without making cookies cakey
- Salt: balances sweet flavor. Use fine sea salt for even blending
- Butter: brings rich flavor and tenderness. Room temperature butter will cream best
- Granulated sugar: keeps the cookies crisp on the edges. Choose a fresh bag for best moisture content
- Eggs: add moisture and help bind everything together
- Vanilla extract: boosts the sugar cookie flavor. Use pure vanilla for the truest taste
- Gel food coloring: lets you achieve vivid swirls without making the dough sticky. I like the Wilton brand for bold colors that hold through baking
Step-by-Step Instructions
- Cream the Butter and Sugar:
- Start by creaming softened butter and granulated sugar in a large bowl with an electric mixer set to medium. Mix for three to four minutes until the mixture is light and fluffy. This helps the cookies turn out tender and uniform.
- Mix in Eggs and Vanilla:
- Add the eggs one at a time, mixing well after each addition. Pour in the vanilla and blend again so the dough smells sweet and fragrant.
- Combine Dry Ingredients:
- Whisk together flour baking powder and salt in a separate bowl to distribute the leavening evenly. Slowly add the dry mixture to the wet ingredients in two batches mixing on low speed just until no streaks remain.
- Color and Divide the Dough:
- Separate the dough evenly between two bowls. Add a small amount of gel food coloring to each portion. Wear gloves if you like then knead the coloring in until you have bright even green and purple doughs.
- Chill the Dough:
- Shape each color into a ball and wrap it tightly in plastic wrap. Refrigerate for at least one hour so the dough firms up and is easy to roll.
- Roll Out the Dough:
- Lightly flour your countertop. Unwrap the purple dough and use a rolling pin to roll it into a large rectangle about a quarter inch thick. Repeat with the green dough aiming for a similar size.
- Layer and Roll the Dough Log:
- Carefully place the green rectangle on top of the purple one. Roll them together gently to help the layers adhere. Trim the edges with a sharp knife for clean sides and a nice swirl.
- Shape and Chill the Log:
- Roll the layered dough tightly into a log tucking in the edges as you go. Rewrap in plastic and chill at least an hour to create perfect spirals.
- Slice and Bake:
- Preheat your oven to 325 degrees Fahrenheit and line baking sheets with parchment paper. Unwrap the dough log and slice cookies about a quarter inch thick. Arrange them two inches apart on the baking sheet and bake for 13 to 15 minutes. Watch carefully as the cookies will brown if overbaked.
- Cool the Cookies:
- Let cookies cool on the baking sheet for five minutes to set then transfer to a wire rack to cool completely before serving or decorating.
 Pin
Pin
I think the magic is in the gel food coloring the boldest colors bake up true and really show off those hypnotic swirls My daughter once insisted on red and orange pinwheels for her Halloween party and they became the talk of her third grade class
Storage Tips
Once fully cooled keep these cookies in an airtight container on the counter for up to a week. If stacking use parchment paper between layers to avoid sticking. For longer freshness the dough log freezes beautifully for two months when wrapped tightly in plastic then sealed in a zip bag. Thaw before slicing and baking.
Ingredient Substitutions
For a dairy free or vegan batch substitute plant based butter and use flaxseed eggs instead of regular eggs. Almond extract is a nice alternative if you do not have vanilla on hand offering a subtle nutty spin. Stick to gel food coloring for the boldest color and to avoid making the dough too wet.
Serving Suggestions
These pinwheel cookies brighten up any dessert table at Halloween parties and are perfect for treat bags or lunchbox surprises. Set up a decorating station with small bowls of icing sprinkles or candy eyes so everyone can add their own special touch to the cookies.
 Pin
Pin
Cultural and Historical Context
Pinwheel cookies have been a whimsical favorite on American holiday trays for generations. They started as marbled chocolate and vanilla swirls but creative bakers now use bold food coloring to tie pinwheels to any occasion from Halloween to spring celebrations. Their playful look and simple layering capture the joy of baking together and sharing something beautiful.
Recipe FAQs
- → What type of flour works best for the dough?
All-purpose flour provides the ideal balance for structure and tenderness in the dough, resulting in a sturdy yet soft cookie texture.
- → How can I get vibrant colors in the dough?
Use gel-based food coloring kneaded thoroughly into the dough for bold, even hues that shine through baking without making the dough sticky.
- → Can I customize the color combinations?
Absolutely. The dough can be divided and tinted with any color gels you prefer to suit any holiday or occasion theme.
- → What’s the best way to store these cookies?
Keep cool cookies in an airtight container at room temperature for up to a week, using parchment sheets between layers to prevent sticking.
- → Is freezing the dough possible?
Yes, the dough log freezes well up to two months when tightly wrapped. Thaw before slicing and baking for fresh results.
- → How do I ensure clean, sharp swirls when slicing?
Chill the layered dough log thoroughly before slicing and use a sharp knife dipped in flour to create crisp edges without smudging the swirls.