
 Pin
Pin
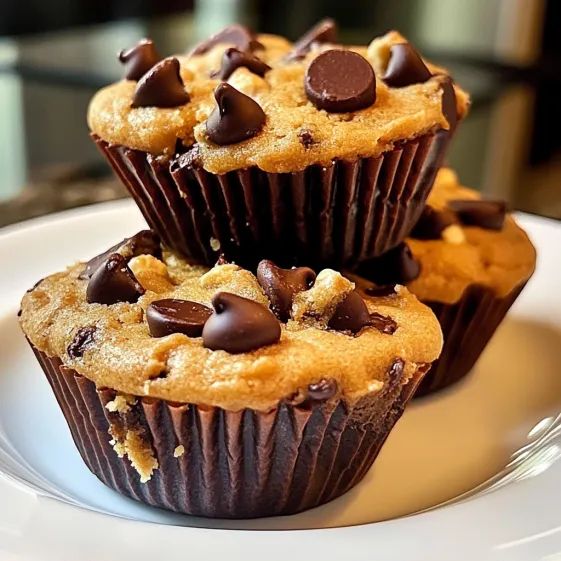
These gooey peanut butter chocolate chip cookie cups are a quick way to win over any crowd. You get soft centers and melty chocolate in every bite, and since they bake in muffin tins, each cup is perfectly portioned with chewy edges and fudgy middles. I reach for this recipe whenever I want something truly comforting that still feels special—my kids call them the ultimate after-school treat.
I started making these when I wanted something portable yet indulgent for picnics. Now they are my most-requested bake for birthday parties and holiday cookie trays.
Ingredients
- Creamy peanut butter: brings that classic deep nutty flavor and keeps the texture moist and chewy Choose a natural peanut butter that is smooth for best results
- Unsalted butter: softens your dough and helps the cookie cups stay tender Find the highest quality for richer flavor
- Brown sugar packed: adds depth of sweetness and a hint of caramel taste Always pack it tightly for correct measurements
- Granulated sugar: balances the molasses notes in the brown sugar and gives a slight crunch seeking pure white sugar makes a difference in baked goods
- Large egg: binds everything together and brings richness Use room temperature eggs for easier mixing
- Vanilla extract: enhances the overall flavor Using pure vanilla works best here
- All-purpose flour: gives structure Look for unbleached flour for better flavor
- Baking soda: lifts the dough so your cookie cups are soft and puffy Make sure yours is fresh
- Salt: sharpens and balances all the sweet flavors Use a fine sea salt so it disappears into the dough
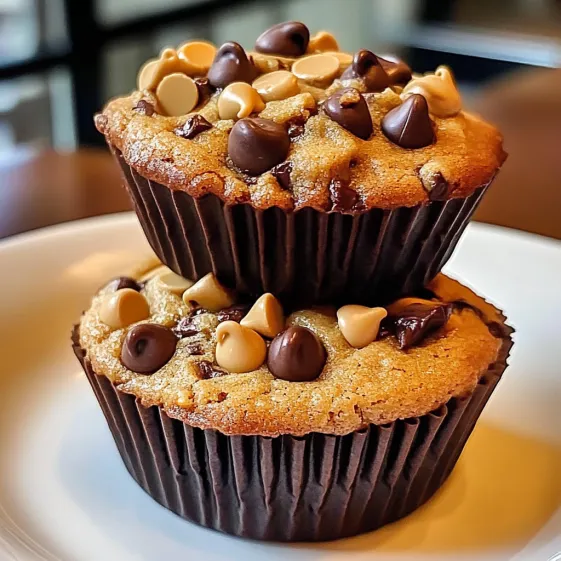
- Semi-sweet chocolate chips: add pockets of gooey chocolate Choose a brand with real cocoa butter for best melt
Step-by-Step Instructions
- Prepare the Pan:
- Set your oven to three hundred fifty degrees Fahrenheit or one hundred seventy-five degrees Celsius Then line a standard muffin pan with either silicone or sturdy paper liners This keeps the cookie cups from sticking and makes removal easy
- Cream the Fats and Sugars:
- Place the creamy peanut butter unsalted butter brown sugar and granulated sugar in a large mixing bowl Using a hand mixer or sturdy wooden spoon beat the mixture together for about two minutes until you notice it grow fluffy and pale in color That airiness helps ensure a light chewy texture
- Incorporate Wet Ingredients:
- Crack the large egg into the bowl and pour in the vanilla extract Mix until everything just comes together and you do not see streaks of egg left in the dough Room temperature egg blends easier and makes the dough smoother
- Combine Dry Ingredients:
- Grab a separate bowl and whisk together the all-purpose flour baking soda and salt Whisk for about thirty seconds to distribute the baking soda and salt evenly throughout the flour This helps create even rise and flavor
- Make the Dough:
- Add the dry ingredients into the wet in three stages Gently mix after each addition just until you see barely any flour left visible Avoid overmixing so your cookie cups stay tender
- Fold in Chocolate Chips:
- Pour in semi-sweet chocolate chips and fold gently using a spatula You want the chocolate distributed but the dough should not be overworked
- Fill and Top:
- Scoop dough into the prepared muffin liners filling each cup about three quarters full For even more chocolate press a few extra chocolate chips onto the tops of each mound of dough This makes the finished cups look extra tempting
- Bake to Perfection:
- Slide the muffin tin into the oven and bake for twelve to fourteen minutes until the tops turn just golden and the centers still look slightly underbaked That little bit of softness in the middle means extra chewy cookie cups
- Cool and Serve:
- Let the cookie cups sit in the hot pan for five to seven minutes so they firm up before carefully lifting them out Transfer to a wire rack to cool fully or eat them warm if you cannot wait
 Pin
Pin
Peanut butter has always been my personal favorite ingredient for sweets It brings back memories of licking the spoon as a child and now my own little ones race to do the same whenever these bake in the oven
Storage Tips
Once cool store the cookie cups in an airtight container at room temperature for up to four days For longer storage you can freeze them in a sturdy freezer bag They thaw in about thirty minutes on the counter and stay just as soft If you love warm cookies microwave each cup for seven seconds before eating
Ingredient Substitutions
If you need a nut free version sunflower seed butter works well though the flavor changes slightly For a gluten free option try a one to one gluten free baking flour Oat flour adds a more rustic texture but the cups will still hold together Dark chocolate chips are an easy swap if you like things less sweet
Serving Suggestions
Serve these cookie cups with a glass of cold milk or crumble into vanilla ice cream for a simple dessert platter You can drizzle them with melted chocolate or a quick peanut butter glaze for parties These also travel well tucked into lunchboxes or picnic baskets
 Pin
Pin
Cookie Traditions
The muffin tin method is inspired by American bake sales and the love for cookies with crispy edges By using liners you get the best of both worlds a cookie that is both soft inside and perfectly shaped for sharing My family always enjoyed little cakes during holidays and these cookie cups feel like a sweet bridge between the two
Recipe FAQs
- → Can I use chunky peanut butter instead of creamy?
Yes, chunky peanut butter adds extra texture and nutty bits. Just make sure to blend well for even mixing.
- → How should I store these cookie cups?
Once cooled, store them in an airtight container at room temperature for up to 4 days to keep them soft.
- → Can I freeze the baked cups?
Absolutely! Place cooled cups in a freezer bag or container. Thaw at room temperature before enjoying.
- → How do I prevent overbaking?
Remove the cups when the centers are slightly soft. They will finish setting as they cool in the tin.
- → Are there substitutes for chocolate chips?
You can use white chocolate chips, peanut butter chips, or chopped nuts for different flavors and textures.
- → Can I make these gluten-free?
Switch to a gluten-free all-purpose flour blend to accommodate gluten sensitivities. Results may slightly vary.