
 Pin
Pin
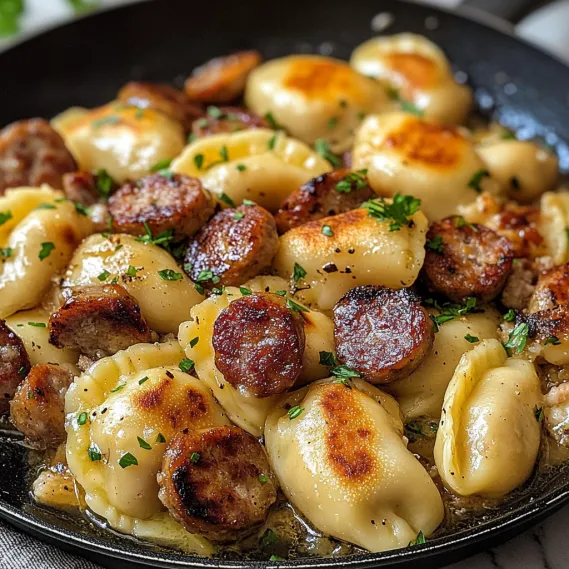
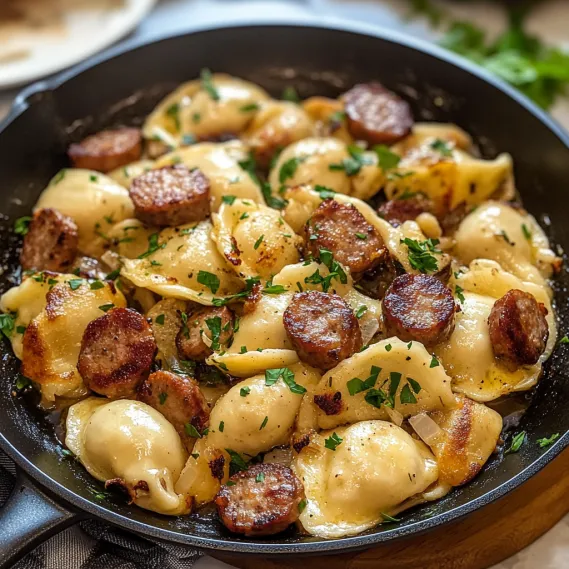
This classic pierogi and sausage skillet brings together tender potato dumplings and savory sausage in one pan for a deliciously comforting meal that comes together in just about 15 minutes. With minimal prep work and maximum flavor, it's the perfect solution for busy weeknights when you need something satisfying without much fuss.
I first made this recipe during a particularly chaotic week when I needed something quick yet satisfying. My family was so impressed with how delicious such a simple dish could be that it's now in our regular rotation, especially on those nights when cooking feels like too much effort.
Ingredients
- Frozen pierogies: the star of the show that provides a satisfying carb component with a soft interior and crispy exterior when pan fried
- Chicken sausage: adds lean protein and tons of flavor; choose precooked varieties with fun flavors like apple or garlic herb for extra dimension
- Yellow onion: caramelizes slightly in the pan creating sweet depth of flavor; sliced into strips rather than diced for better texture
- Butter: creates that irresistible golden crust on the pierogies and adds richness throughout the dish; use salted butter for best flavor
- Olive oil: helps prevent sticking and adds a touch of healthy fat; use a good quality but not your most expensive bottle
- Fresh parsley: optional but adds a pop of color and fresh flavor to balance the richness
Step-by-Step Instructions
- Boil the Pierogies:
- Fill a large pot with water and bring to a rolling boil over high heat. Carefully add the frozen pierogies without overcrowding. Let them cook undisturbed for 4 to 5 minutes until they float to the surface signaling they're done. Watch carefully as overcooking can make them mushy.
- Brown the Sausage:
- While the pierogies boil heat a large skillet over medium high heat until it feels hot when you hold your hand above it. Add olive oil and swirl to coat the surface. Add the sliced sausage coins in a single layer allowing them to sear undisturbed for 1 to 2 minutes before stirring. Continue cooking until you see golden brown edges forming around the sausage pieces about 2 to 3 minutes total.
- Soften the Onions:
- Add the sliced onion strips directly to the sausage in the skillet spreading them out to maximize contact with the hot surface. Cook stirring occasionally for 2 to 3 minutes until they begin to soften and become slightly translucent. They should still have a bit of texture not completely soft.
- Combine and Crisp:
- Use a slotted spoon to transfer the drained pierogies directly to the skillet arranging them in a single layer as much as possible. Position them so they make good contact with the hot pan to promote browning. Be gentle to avoid breaking the tender pierogies.
- Add Butter and Finish:
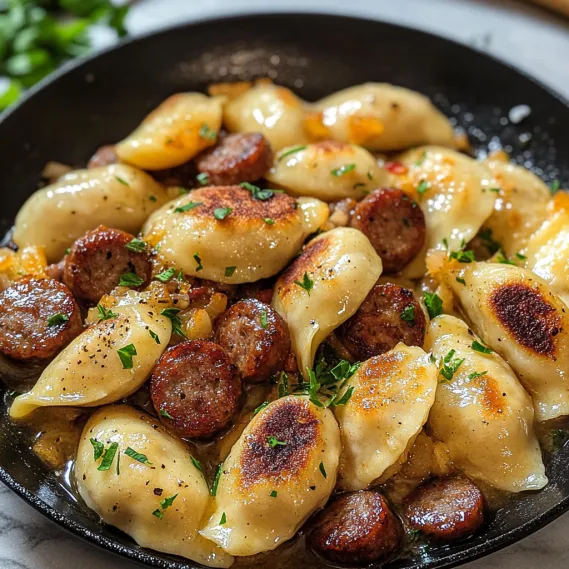
- Drop small pieces of butter around the pan allowing it to melt and coat everything. The butter will foam slightly and begin to smell nutty. Gently toss or flip components with a spatula every minute or so to ensure even browning. Cook for 4 to 5 minutes until pierogies develop golden brown spots.
- Serve Immediately:
- Transfer the entire skillet contents to a serving platter or individual plates while still hot. Sprinkle with freshly chopped parsley if using and serve immediately for the best texture and temperature.
 Pin
Pin
Storage and Reheating
This dish is best enjoyed immediately after cooking when the pierogies are at their optimal texture crispy on the outside and tender inside. If you do have leftovers store them in an airtight container in the refrigerator for up to 2 days. To reheat avoid the microwave which will make the pierogies soggy. Instead warm them in a skillet over medium heat with a small pat of butter until heated through. This helps restore some of the original crispness.
Easy Variations
The beauty of this recipe is how customizable it is to your preferences. Try using kielbasa or smoked sausage instead of chicken sausage for a more traditional flavor profile. You can also experiment with different pierogi flavors potato and cheddar are classic but mushroom sauerkraut or sweet fruit filled varieties can create entirely different meal experiences. For added nutrition toss in a few handfuls of baby spinach or kale during the final minute of cooking just enough to wilt the greens without overcooking them.
Serving Suggestions
Complete this hearty skillet meal with simple complementary sides. A crisp green salad dressed with vinaigrette provides welcome freshness against the rich main dish. Alternatively a side of braised red cabbage offers traditional Eastern European flavors that pair beautifully with the pierogies. For a casual gathering serve with a dollop of sour cream and some applesauce on the side allowing guests to add their preferred condiments. This approach honors the traditional Polish way of enjoying pierogies while keeping the meal accessible.
 Pin
Pin
Cultural Context
Pierogies originating from Eastern European cuisine have become a beloved comfort food across North America especially in regions with strong Polish Ukrainian and Russian heritage. Traditionally handmade by families working together these dumplings were often reserved for special occasions and holidays. The convenient frozen version we use in this recipe makes this once laborintensive dish accessible for everyday meals while maintaining the spirit of the comfort food tradition. The addition of sausage creates a complete onepan meal that honors the hearty practical nature of Eastern European cooking.
Recipe FAQs
- → What type of perogies work best for this skillet dish?
You can use any flavor of frozen perogies in this recipe. Potato and cheese varieties are classic choices, but onion, mushroom, or sauerkraut fillings would also work beautifully. The key is ensuring they're boiled properly before adding to the skillet for that perfect texture contrast.
- → Can I substitute the chicken sausage with another type?
Absolutely! This versatile dish works well with many sausage varieties. Try smoked kielbasa for a traditional pairing, Italian sausage for extra herbs and spices, or even a plant-based sausage alternative for a vegetarian version. Just adjust cooking times as needed based on whether your chosen sausage is pre-cooked.
- → How can I make this dish more flavorful?
To enhance flavors, consider adding minced garlic with the onions, a sprinkle of paprika or red pepper flakes for heat, or a splash of white wine to deglaze the pan. Finishing with fresh herbs like dill or thyme (in addition to the parsley) or grating some Parmesan cheese over the top before serving will add another dimension of flavor.
- → What side dishes pair well with this skillet meal?
A simple green salad with vinaigrette dressing makes a perfect light side to balance the heartiness of the dish. For more substantial sides, consider steamed or roasted vegetables like broccoli or Brussels sprouts, braised red cabbage, or a dollop of sour cream and applesauce served alongside – both traditional accompaniments to Eastern European dishes.
- → Can I prepare any components of this dish ahead of time?
Yes! You can slice the sausage and onions up to a day ahead and store them refrigerated in airtight containers. For a partially prepared meal, you could boil the perogies in advance, toss them with a bit of oil to prevent sticking, and refrigerate. When ready to eat, simply proceed with cooking the sausage and onions, then add the pre-boiled perogies to brown and heat through.
- → How do I store and reheat leftovers?
Store any leftovers in an airtight container in the refrigerator for up to 3 days. For best results when reheating, use a skillet over medium heat with a small amount of butter or oil to restore some of the crispy texture. Microwaving works in a pinch but may result in softer perogies. The dish doesn't freeze well after cooking as the texture of the perogies may become soggy.